Last weekend, I upgraded Windows Vista Ultimate to Windows 7 Ultimate on my Dell Studio xps laptop. I chose to upgrade, rather than perform a complete installation because I have too many programs and a lot of data on my laptop and I didn’t want any overhead in dealing with them. It’s just around seven months since I purchased my laptop and already my DVD drive isn’t working (will need to contact Dell Support and use the warranty). This is 2nd time I’m using the warranty on a Dell laptop to replace a DVD drive (the first time was with my Dell Inspiron 8500), but I still chose to buy Dell, only because Dell provided the most customization options when purchasing the laptop (now running out of patience with Dell).
So, with my DVD drive bust, I needed to perform the upgrade from a USB flash drive. I’ve been using USB flash drives for a few years and since the last couple of years, I’ve stuck with the retractable SanDisk Cruzer Titanium USB flash drives. I like the retractability and the solid build of these drives. I have the 2 GB and 8 GB capacities of the SanDisk flash drive and had to use the 8 GB flash drive for the upgrade. The upgrade steps I performed are given below:
STEP 1: Choose the correct upgrade edition of Windows 7 Ultimate.
I first obtained the Windows 7 Ultimate N edition and then during installation, a window popped up telling me that I cannot upgrade from Windows Vista Ultimate to Windows 7 Ultimate N and need to do a complete install.
Refer to the Windows 7 upgrade paths to ensure you obtain the correct Windows 7 edition for your upgrade.
STEP 2: Download/Copy the Windows 7 Ultimate ISO image to your hard drive (use SSD if you have one for faster copying).
I downloaded the Windows 7 Ultimate ISO image (en_windows_7_ultimate_x64_dvd_x15-65922.iso – around 3 GB) to my laptop’s HDD.
If you’re downloading the ISO image, ensure that you have sufficient free space in your download location and you turn off your computer’s power saving feature so that your computer does not sleep.
Downloading the ISO frustrated me – my first attempt failed because Google Chrome simply balked after downloading 2.8 GB, my second attempt (using Mozilla Firefox) failed because my laptop went to sleep and I finally downloaded the entire ISO image successfully on my third attempt.
STEP 3: Create a Windows 7 Ultimate bootable USB flash drive
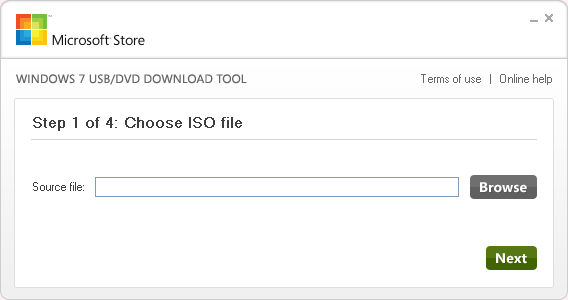
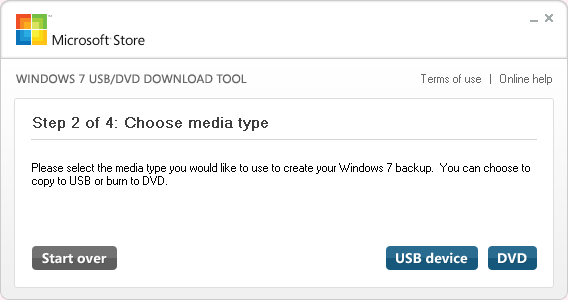
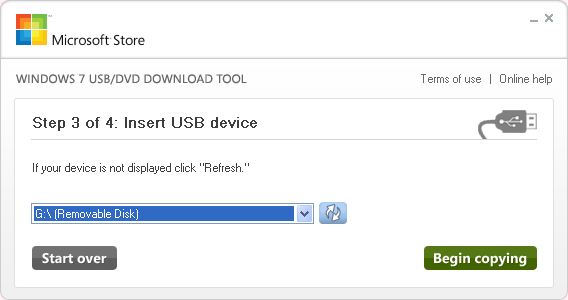
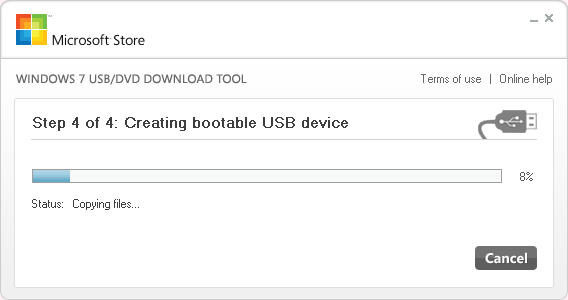
You cannot install/upgrade Windows 7 directly from the ISO. You first need to create Windows 7 bootable media. Popular media are DVDs and USB flash drives (USB 2.0 flash drives are faster than current DVDs for data reading/writing operations and this advantage will significantly increase with USB 3.0). Microsoft provides a free Windows 7 USB/DVD Download tool. If Microsoft removes this tool from their website (I believe there was an issue with using some open source code in the software), then you can get it from other websites or let me know and I can provide you with the tool. Screenshots of the tool are given below:
STEP 4: Prepare for Upgrade
Use the Windows 7 Upgrade Advisor to ensure you meet all the requirements for the upgrade. I had to install Windows Vista Ultimate updates and SP1 to meet the requirements.
STEP 5: Upgrade
Click the “setup” file on your Windows 7 Ultimate bootable flash drive and proceed with the upgrade. You will be required to reboot your computer a few times. I don’t remember how long this process took as I was doing it while half asleep at night. All I know, come dawn, I woke up to Windows 7 Ultimate on my laptop.
My first impressions of Windows 7 Ultimate:
So, I’ve used Windows 7 Ultimate only for a week and haven’t really explored much, but some of the good features that impressed me straight away:
(1) Very fast: Windows 7 Ultimate is the fastest Windows OS I have ever used. Perhaps, running the 64-bit version on a dual-core chip with 4 GB plays a major role, but I can perform routine operations quickly.
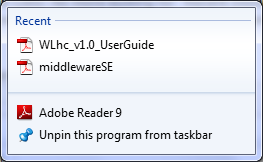
(2) Jump Lists: No more looking for “Recent Documents” and thinking about where you stored a specific resource. Just use the “jump list” on the appropriate program and you can jump right away to what you want. Given below is a screenshot of my Adobe Reader jump list displaying the recent pdf files I used.
(3) Snap: Drag windows to screen edges and they resize appropriately. I found this especially useful when using programs that required me to “drag and drop” files from an explorer window into the program’s window (an example of such a program is the Samurai Thread Dump Analyzer).
Well, there is a lot more for me to explore in Windows 7 and I’m specifically interested in Windows 7 Ultimate features like SUA.

This is a great step-by-step upgrade instructions using USB flash drive.
I’m just curious about other application software that create bootable image as Windows version seems to be removed.
Thanks in advance :::