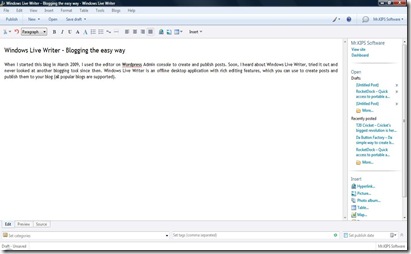
When I started this blog in March 2009, I used the editor on the WordPress Admin console to create and publish posts. Soon, I heard about Windows Live Writer, tried it out and never looked at another blogging tool since then. Windows Live Writer (WLW) is an offline desktop application with rich editing features, which you can use to create posts and publish them to your blog (all popular blogs are supported). A screenshot of WLW taken while creating this post is shown below:
WLW provides the standard features available with good text editors along with blog-specific features like managing different blog accounts, opening and retrieving recently published posts, scheduling publishing of posts and extension via plug-ins. For example, I’ve used a text template plug-in to create a template for certain types of posts, so that whenever I wish to create such a post, I simply use the template and fill in the blanks.
So, WLW makes blogging easy, but I still had the problem of blogging being tied to the laptop on which I had WLW installed. I use 2 laptops, one at office and one at home. Sometimes, I get some ideas for a post at office and wish to just make some quick notes for continuation later. How nice it would be if I can carry the same WLW installation with me wherever I go. i.e. use a portable WLW. Searched online and found a Portable launcher for WLW here. Thanks to Scott Kingery, blogging has been made even easier by becoming portable. I use portable WLW on my USB drive so that all my blog work is saved to the USB drive. Instructions for installing WLW and making it portable are given below:
Installation Of Windows Live Writer:
(1) If you do not already have Windows Live Writer on your computer, download Windows Live Writer from here and install it.
NOTE: Windows Live is a software suite provided by Microsoft. So, when you launch the installer downloaded in step (1), you will be provide with options to install one or more Windows Live applications. If you’re only interested in WLW, then select only WLW and proceed with the installation.
Making Windows Live Writer Portable:
(2) ![]() or visit TechLifeWeb for the latest update on this software.
or visit TechLifeWeb for the latest update on this software.
(3) Extract the downloaded ZIP file for WLW Portable into your USB drive. For example, my USB drive is assigned drive letter P: and I extracted WLWPortablev3.0 into P:, thereby creating a directory P:\WLWPortable3 with sub-directories and files within.
(4) Assuming you installed WLW in step (1) into the default location, copy all the files from C:\Program Files\Windows Live\Writer to the following location within the extracted WLWPortable3 on your USB drive: WLWPortable3\WindowsLiveWriterPortable\App\WindowsLiveWriter
(5) You can now launch WLW Portable v3.0, by clicking on WLWPortable3\WindowsLiveWriterPortable\WindowsLiveWriterPortable.exe. I dragged this WLWPortable executable file onto my RocketDock so that I can easily launch WLWPortable as soon as my USB drive is inserted into my laptop. A screenshot of my set up (WLWPortable Launcher in RocketDock) is shown below:
As the above steps make WLW portable, you may even uninstall WLW from your computer and you will still be able to use WLW from your USB drive (remember you copied a bunch of installation files to your USB drive in step(4)).


