Installing Windows Subsystem for Linux 2 on Windows 10 Version 1909 (OS Build 18363.1016)
STEP 1: Enable WSL
Open PowerShell or Command Prompt as Administrator and execute the following:
dism.exe /online /enable-feature /featurename:Microsoft-Windows-Subsystem-Linux /all /norestart
dism.exe /online /enable-feature /featurename:VirtualMachinePlatform /all /norestart
Restart your machine after executing the above commands.
STEP 2: Install WSL2 Support for Windows 10 1903/1909
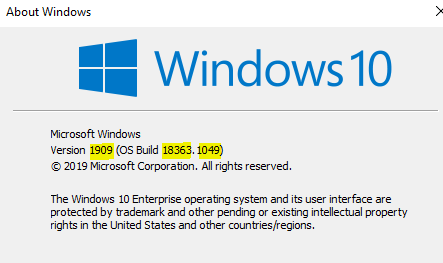
Download KB4566116 . This is required to take your Windows OS to version 1909 (OS Build 18363.1049) for WSL 2 support, as shown below:

This installation takes a long time.
STEP 3: Install an updated WSL2 Linux kernel
Download the latest WSL2 kernel and install it.
STEP 4: Get your Linux distro
Get your Linux distro either from Microsoft store or manually download it.
STEP 5: Set WSL version
Set your WSL version for a specific distro
wsl --set-version <distribution name> <versionNumber>
Or set your default WSL version
wsl --set-default-version <versionNumber>
Enjoy Linux on Windows! With WSL 2, you have a full Linux kernel (Microsoft’s Linux kernel built from source code from kernel.org) running as a “guest VM”.
NOTE: At the time of publishing this article, WSL 2 connectivity with the Windows host and the outside world breaks when connected to VPNs. Many users have reported this issue when on personal/corporate VPNs from various providers (Cisco, Netscaler, Checkpoint, etc.). I have experienced the same issue.
References:
- https://docs.microsoft.com/en-us/windows/wsl/install-win10
- https://docs.microsoft.com/en-us/windows/wsl/wsl2-index
- https://devblogs.microsoft.com/commandline/wsl-2-support-is-coming-to-windows-10-versions-1903-and-1909
- https://www.catalog.update.microsoft.com/Search.aspx?q=KB4566116
